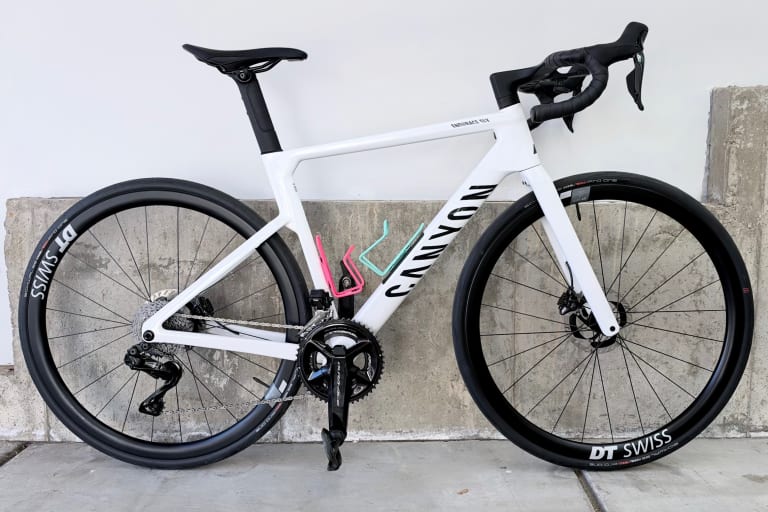
My new bike is a 2027 Canyon Endurace CF SLX 9 Di2. These are my owner notes: what I love about it, what bugged me, and how I fixed it, including screw sizes for its open holes and four 3D-printed parts you can download for free.
Highlighted Specs
You know I got the white; it's my favorite bike color. And I got the size small frame, and it fits me perfectly at 174cm height and 81cm inseam.
| Part | Spec |
|---|---|
| Frame | Canyon Endurace CF SLX, carbon, size S, white |
| Groupset | Shimano Dura-Ace Di2 R9200, 12-speed |
| Wheels | DT Swiss ERC 1400 Dicut 35, carbon, 240 Ratchet EXP 36 Hub |
| Tires | Schwalbe Pro One Evo, 32 mm |
| Cockpit | Canyon PACE T-Bar, 90 mm, compact drops |
| Saddle | Fizik Aliante R5 |
What I love
This bike is light, nimble, and fast. I took the bike on its first 30 mile (48km) inaugural ride on my usual hilly route, and I already hit some PRs with this bike. Maybe I was just excited to ride the bike that the adrenaline was what made the PRs possible; maybe it was the cool fall weather. Either way, the ride was fast, the drivetrain silent, and the quiet hum of the 240 hub was intoxicating.
Geometry
The geometry of this bike was perfect for me. I prefer a more comfort orientated geometry with a slightly higher stack, and the measurements of this frame, along with the 165mm cranks, fit me like a glove.
I love doing triathlons in addition to endurance rides, but I am not out to podium and I don't push 300+ watts for hours on end, so I don't need the fastest bike; I need a comfortable bike that can go fast.
Endu-race
Did you know that this bike is called the Endurace and not Endurance? I kept reading it as Endurance, but it is actually Endu-race, which is the combination of endurance + race. Canyon's racing pedigree not only made this bike fast, but it made this fast bike comfortable.
Aerobars
What's nice about this cockpit is that the top screw mounts on the handlebars make it so you can easily mount aero bars on the top of it. Canyon makes their own sleek Gear Groove Aero Extension you can mount for a ridiculous price, or you can pick up Adventure Hydration Gear Groove Aerobar Adapter that lets you mount your own clip-on aero bars.
I already own a pair of Zipp Vuka Clip aerobars, so Adventure Hydration's mount was perfect for me; and much better priced.
What I store in the storage compartment
I love the frame's built in storage compartment that is accessed under the water bottle cage mount. I no longer have to carry around a seat pouch under the saddle or worry about not having my emergency supplies with me.
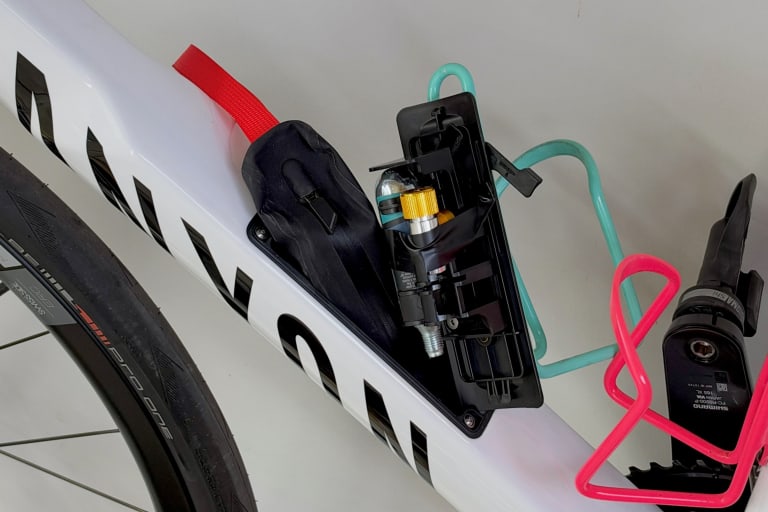
I got Canyon's LOAD Tool Pack that was designed for this cavity to help getting things in and out easier, and it works perfectly.

- spare tube + tire levers
- CO2 cartridge + mini inflator
- USB-C Di2 charger + USB-C cable
- bike multi-tool
- $20
- Apple AirTag
Everything fit in the load pack very well, except for the tube. For the spare tube, I folded it into a nice long tube shape, and shoved it up into the frame cavity towards the stem; it fit nicely in there and it is super easy to get in and out. And no, I don't notice or feel any of the items in the frame as I ride around; I forget that it is there honestly.
I carry the USB-C Di2 charger so I can charge the Di2 battery off my phone if needed in a pinch.
Nitpicks: What I Didn't Like
The front axle doesn't reach the end of the fork
With the thru-axle tightened, its tip stops short of the end of the right fork leg, so you can see empty threads. I asked Canyon and it's expected: the threaded hole in the fork is longer than the axle's threads.

What matters is that the wheel is clamped: 12 Nm with a 6 mm hex. And to cover the open threads, I designed and 3D printed my own axle plug, in black PETG, that nicely covers the open threads and axle hole to keep it clean of debris.
The Dura-Ace power meter is a random number generator
The bike comes with Shimano's Dura-Ace FC-R9200-P power meter crank. On paper it's dual-sided and accurate to ±1.5%. In practice my numbers looked off, and I'm not the only one: on Reddit it's commonly called a "random number generator".
- The right (drive-side) crank tends to read low, and the error changes with the chainring you're in.
- It isn't a steady offset you can correct for. It drifts from ride to ride and within a ride. DC Rainmaker called it "astonishingly inaccurate".
- Shimano's firmware fix (4.2.0) pairs the meter with Di2 to adjust for the chainring. GPLama and DC Rainmaker both retested it and say it didn't fix the problem.
What I use instead: the Favero Assioma Duo-Shi power meter spindles I already had in my Shimano Ultegra pedals. Favero rates them at ±1%, and unlike the Shimano crank, they hold up in independent testing: DC Rainmaker called their data "spot-on".
Too much brake lever travel
The brakes feel firm and bite well, but the lever moves a long way before the pads touch the rotor. It isn't air in the system. Shimano made the gap between the pads and the rotor wider on these calipers to stop rotor rub.
I had already maxed out both adjustments on the lever, the reach and the preload (free-stroke) screw, and it still had too much travel. What fixed it was resetting the pads to rest closer to the rotor, using a spacer a bit thinner than the rotor.
Open screw holes
Several threaded holes come without bolts in them:
- the Gear Groove, under the Pace T-bar
- both rear frame stays, one on each side
- the back of the seatpost
- the frame's water bottle cage mounts
I bought screws to fill them (see Screw Sizes below).


Di2
Shift mode
I use semi-synchro. I live in Colorado, with lots of climbs, and I want to choose when the front shifts so I can drop to the small ring before a climb starts. Full synchro can't see the road ahead, so it tends to drop to the small ring mid-climb and spin your legs out. In semi-synchro, dropping to the small ring also moves the rear 2 cogs, which leaves me one gear easier, just right going into a climb.
Button setup
The extra buttons (top hood) on the shifters send D-Fly channels to my Garmin Edge 540, where I assign what each one does:
| Button | D-Fly channel | Click | Double-click | Hold |
|---|---|---|---|---|
| Left | Ch 3 | Previous page | unassigned | Map |
| Right | Ch 4 | Next page | Next page | Start/stop |
What I learned about double-click
Unassign it if you can. While top hood button has a double-click action, the bike computer waits after every click to see if a second one is coming, so single clicks feel slow. With double-click unassigned, a single click works right away. This is true on Garmin and some other bike computers.
On Garmin, use channels 3 and 4. Other riders report that channels 1 and 2 won't let you unassign double-click, but channels 3 and 4 apparently will.
On my Edge 540 it only half worked. I could unassign the left button's double-click, but not the right's, and I don't know why. I can definitely feel the difference: the right button's single click is noticeably slower than the left's.
Screw Sizes
What each open hole takes:
| Where | Screw |
|---|---|
| Gear Groove, under the T-bar | M6 x 12mm |
| Rear frame stays (each side) | M4 x 8mm |
| Back of the seatpost | M4 x 8mm |
| Bottle cage mounts | M5 x 12mm |
My 3D Models
I designed and 3D printed four small parts for this bike, and they're free to download.
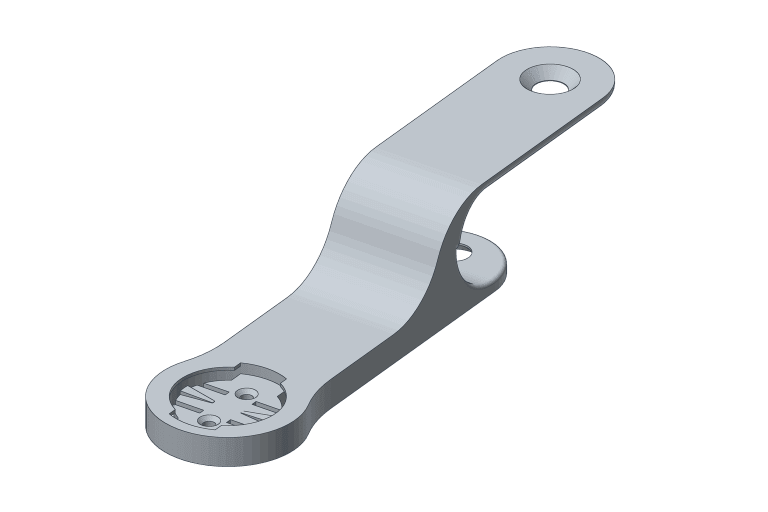
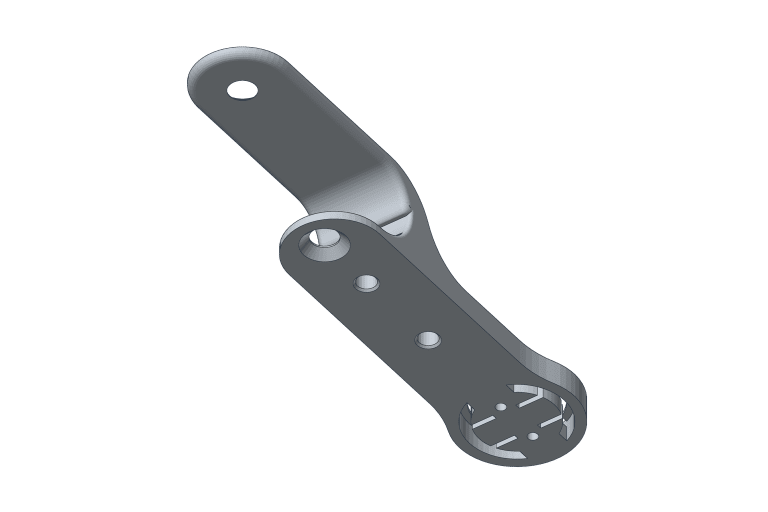
The front axle plug hides the open threads at the end of the fork. The other three are for the Gear Groove, Canyon's accessory interface on the CP0039, CP0047 and CP0048 cockpits: a top cap, a Garmin mount, and an action mount for a camera or light. Print and remix them however you like, just don't sell them (CC BY-NC 4.0).
Hardware:
- Top cap: M6 x 12mm countersunk
- Garmin mount: M6 x 12mm countersunk, into the Gear Groove, plus 2 × M4 heat-set inserts for the version with holes
- Action mount: 2 × M4 x 6mm or M4 x 8mm screws, into the heat-set inserts


| Model | What it does | Download |
|---|---|---|
| Front axle plug | Covers the open threads where the thru-axle stops short | STL (126 KB) |
| Top cap | Covers the top of the Gear Groove | STL (127 KB) |
| Garmin mount | Out-front Garmin mount | STL (578 KB) |
| Garmin mount, with insert holes | Same, plus holes underneath for M4 heat-set inserts | STL (592 KB) |
| Action mount | GoPro-style mount for an action cam or a front light | STL (165 KB) |
I print them all the same way:
| Setting | Value |
|---|---|
| Material | PETG |
| Layer height | 0.16 mm |
| Infill | 20% gyroid |
| Walls | 5 |
| Supports | organic (tree) |
| Ironing | top layer, optional |